Monster High – Cleo de Nile Tutorial
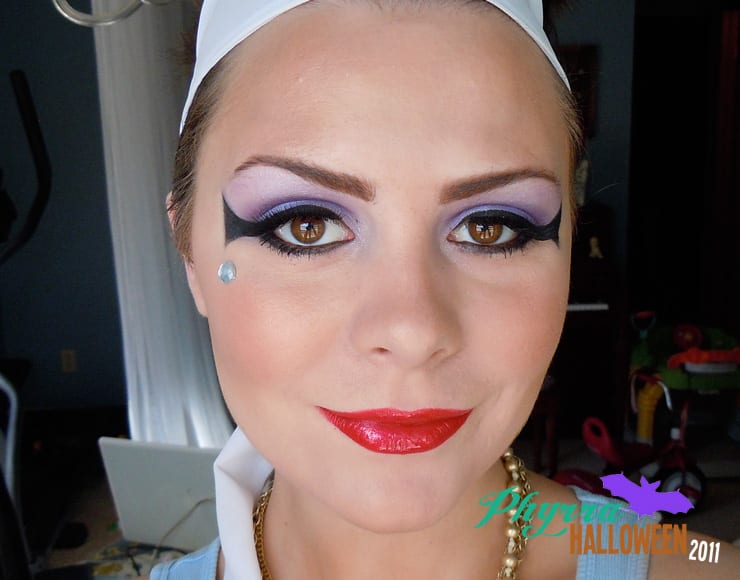
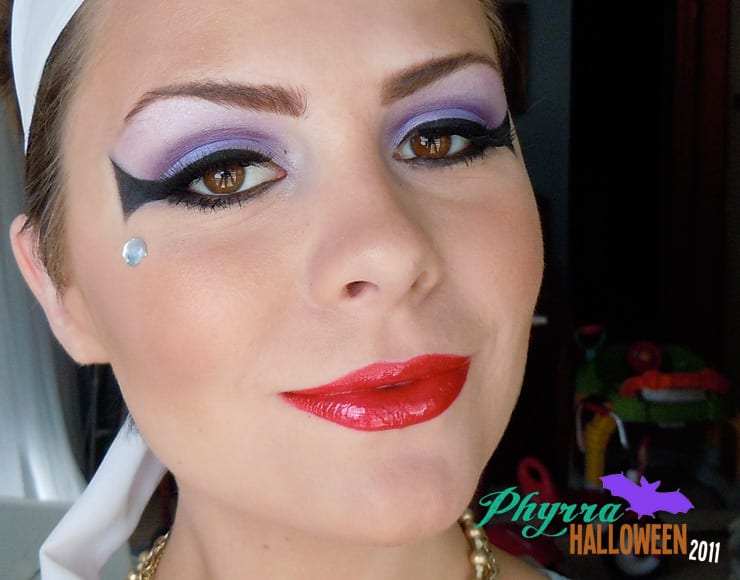
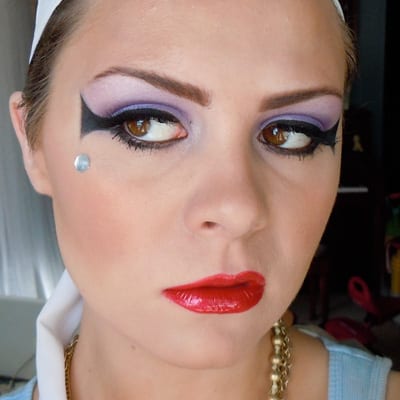
Today I have a guest post for you from the pretty Erin of the Pretty Exclusive! I asked her if she would do some cute Monster High looks for Halloween! Today’s look is of Cleo de Nile. Cleo is the daughter of the Mummy. She’s got a cute little cobra named Hissette. She’s an Egyptian princess, of course. (See the second look in this series, Draculaura)
What You’ll Need… The products I used are listed below in the order listed here.
• A foundation (slightly darker than your skin tone if you are pale)
• Concealer
• Bronzer
• Warm peach blush or bronzer
• Eyeshadow primer
• A rainbow sparkle shadow
• A light purple eyeshadow
• A bright purple eyeshadow
• A rich purple eyeshadow
• A gel or pen eyeliner
• A matte black eyeshadow
• Black pencil eyeliner
• Volumizing mascara
• False eyelashes (strips & individuals)
• Lash glue
• Matte brown eyeshadow
• Bright red lip liner
• Sparkly bright red lipstick
• Clear lipgloss
• Angled eyeliner brush
• Mid-sized paddle shaped brush
• Fluffy blending brush
• Blush brush
• A sticky backed rhinestone
Step-by-Step Guide
Let’s start with the face!
First, let’s get our face makeup on. For you paler folks, choose a foundation that slightly darker or tanner than your skin tone. If you are a tanned or darker skinned beauty, then apply your favorite foundation all over your face (and down your neck if you are pale). Next, cover any blemishes or under eye circles with concealer. Instead of powder, you want to use a bronzer to set your face makeup. Use a bronzer that’s one shade darker than your skin tone and matte, if you have it. I used Physician’s Formula Healthy Wear Bronzer in ‘Light.’ Using a blush brush, start by sweeping the bronzer across your forhead, add some down your nose, then across your cheeks and finish with a little on your chin. This is where the sun naturally tans skin. However, you also want to define your cheekbones, so apply the bronzer to the hallows of your cheeks to make them stand out. Just suck in your cheeks (make a fishy face!) and apply the powder back and forth in that groove. Don’t leave the line to sharp, however, and blend it out gently. You want to a sharp bronze color but a soft line. To finish up with the face, use a more peachy orange bronzer or blush and apply this to the apples of your cheeks.
Now for the eyes!
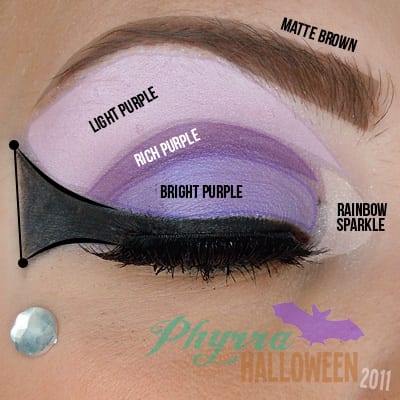
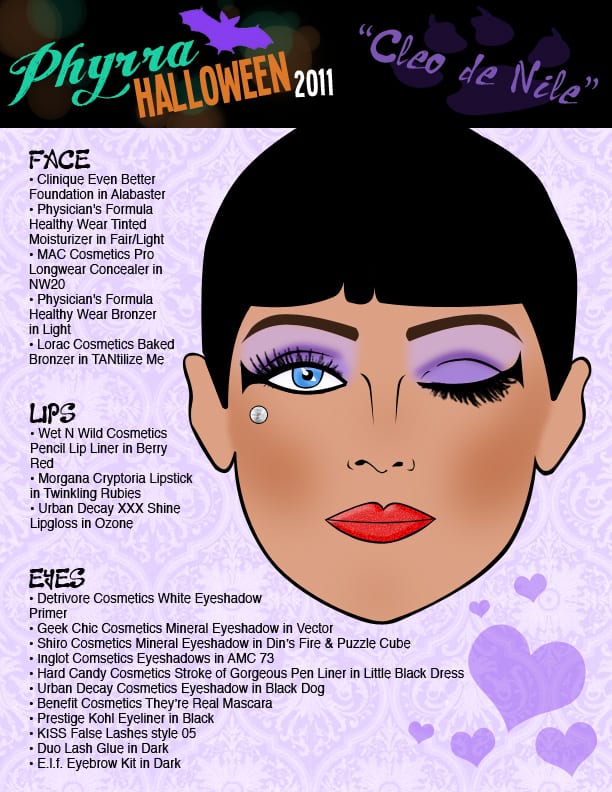
If you have trouble following these directions, use the eye image below for reference.
As always, you want to start with a good eyeshadow primer. It brightens the color of shadows and makes them last longer on your lids. I used Detrivore Cosmetics’ White Eyeshadow Primer. If you aren’t a fan of NYX Cosmetics or their Jumbo Eye Pencils, this is a GREAT alternative. There are one three colors but the texture is similar. (Though I think Detrivore’s better in terms of shadow wear and blendability. Just sayin’) 🙂
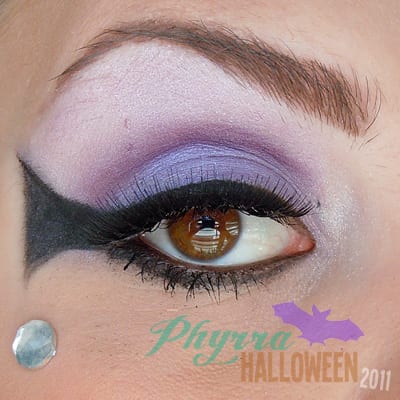
Anywho, next, take a paddle brush and apply a light purple eyeshadow all over your lid. And when I say all over, I mean alllll over; from the top of your lashes all the way up to your brows. Bring the color out to where your eyebrows end. I used Shiro Cosmetics’ Mineral Eyeshadow in ‘Din’s Fire.’ Next, take a bright purple eyeshadow and apply it to your lid but keep it below your crease. Also bring the color out a bit to past the outer corner of your eye. For the crease, use the tip of your paddle brush and apply a rich purple eyeshadow to the line of your crease. You want this color to be bold but not sharp, so blend it back and forth to soften the edges. Start past the outer corner of your eye a little and then blend the color in. Keep adding color and blending til you get a nice rich purple crease. I used Inglot Cosmetics’ ‘AMC 73’ eyeshadow. To add just a bit of glitz, apply a little rainbow colored sparkle to the inner corner of your eye. I used Shiro Cosmetics’ ‘Puzzle Cube’ mineral eyeshadow.
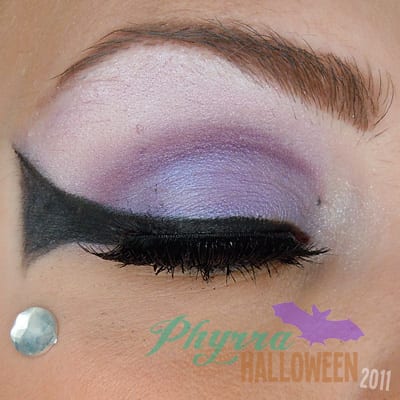
Time to line! First, using a pen eyeliner, make a dot near the end of your eyebrow. I used Hard Candy Cosmetics’ Stroke of Gorgeous Eyeliner in ‘Little Black Dress.’ A few centimeters below it, make another dot. It should look like the dots in the picture above. Then, starting at the inner corner of your eye, start lining your eyes, bringing the line up a little the further you move towards the outer corner. When you reach that edge, connect the to the dot with a slightly curved line. Connect the two dots together then with another curved line (this one curving up rather than down) connect the second dot to the outer corner of your eye. Finish up line but brining it under your lash line and connecting it to the inner corner of your eye. Now it’s time to fill. First fill in the triangle you created at the outer part of your eye, then go over the other liner again to make it darker. Next, using an angled brush, apply a matte black shadow over top the liner. This will make the liner last longer and even out the color. You can also use the black eyeshadow and angled brush to sharpen up any edges of the triangle. I came back and went over the curved lines that connect the shape to my eye to make them more crisp. If you’ve messed up, don’t worry. Dip a cotton swab into some makeup remover and use it like an eraser over any mistake. Then you can just reapply whatever color your took away.
To finish up the eyes, apply a few coats of your favorite volumizing mascara, line your water line with a black or kohl eyeliner, then apply some dense false lashes to your upper lashes. I used KISS False Lashes style 05, Prestige Kohl Eyeliner in ‘Black,’ and Benefit Cosmetics They’re Real Mascara. Lastly, before we move onto the lips, fill in your eyebrows with a medium brown color. Make your brows nice and full but not to sharp. I used an angled brush and E.l.f.’s Brow Kit in ‘Dark,’ though I only applied the lighter powder (not the dark wax).
Let’s color those lips!
First, use a bright red lip liner to line your lips. I used Wet N Wild’s Lip Liner in Berry Red. Draw the line a little further out from the natural shape of your lips to make them appear larger when you put on your lipstick. To fill your lips in, use a sparkly bright red lipstick. I used, and recommend, Morgana Cryptoria’s Twinkling Rubies. Its a gorgeous red and chalk full of sparkle. Top with a clear gloss to finish up your lips! I used Urban Decay’s XXX Shine Lipgloss in Ozone.
Finally, the diamond!
Cleo has a signature diamond below her right eye (I think it’s her right anyway) and getting one to apply is easier than you’d think. I went to my local craft store (Michael’s) and purchased a pack of plastic rhinestones that had already sticky backs. I just popped it off the sheet and placed it on. They are totally sticky enough to last all night. If you can’t find sticky backed rhinestone however, buy some plain plastic ones and then head to your local Halloween shop (you know you have one; ours uses the old Hollywood video store to sell it’s spooky wears) and pick up some spirit glue as well. Spirit glue is a costume/prosthetic glue used in special effects makeup. Its very liquid-y, so let the glue set on the back of the rhinestone for a bit before you place it on your cheek. I’d press it into your skin with your finger for a bit to makeup it dries and holds.
And that’s it! You now look like the queen bee of Monster High, Cleo de Nile. Grab your Fearleaders, your slithery boyfriend and party like it’s 2000 BC.
Products I Used
On my face…
• Clinique Even Better Foundation in Alabaster
• Physician’s Formula Healthy Wear Tinted Moisturizer in Fair/Light
• MAC Cosmetics Pro Longwear Concealer in NW20
• Physician’s Formula Healthy Wear Bronzer in Light
• Lorac Cosmetics Baked Bronzer in TANtilize Me
On my eyes…
• Detrivore Cosmetics White Eyeshadow Primer
• Shiro Cosmetics Mineral Eyeshadow in Din’s Fire and Puzzle Cube
• Geek Chic Cosmetics Mineral Eyeshadow in Vector
• Inglot Comsetics Eyeshadows in AMC 73
• Hard Candy Cosmetics Stroke of Gorgeous Pen Liner in Little Black Dress
• Urban Decay Cosmetics Eyeshadow in Black Dog (From their Black Palette)
• Prestige Kohl Eyeliner in Black
• Benefit Cosmetics They’re Real Mascara
• KISS False Lashes style 05
• Duo Lash Glue in Dark
• E.l.f. Eyebrow Kit in Dark
On my lips…
• Wet N Wild Cosmetics Pencil Lip Liner in Berry Red
• Morgana Cryptoria Lipstick in Twinkling Rubies
• Urban Decay XXX Shine Lipgloss in Ozone
~
Thanks Erin! Your Cleo is lovely!
What do you think of the Cleo de Nile look? Isn’t it cute? How do you feel about Monster High?

I love the purples here… Purple is my favorite color and my favoite eye shadow color… <3 this look!
Glad you love it Amber 🙂
Monsters are not supposed to be “cute” and I find these dolls vaguely insulting…like goth lite. Not to mention they just look like barbie dolls with different outfits on which isn’t original at all, and they are all dressed like sluts, I mean, thankfully I have boys but who lets their girls go out dressed like that?! Not a role model or even a toy I would want for my kids…so yeah, I think they suck-but the tutorial is pretty cool 🙂
Well, I’m glad you like the tutorial! I would have loved dolls like this, or like the new tokidoki Barbi as a kid.
I’m 31 and I love those dolls especially Frankie Stein! This is a really fun tut I wish
you’ll do a whole series of Monster High makeup looks. 🙂
We are 🙂
My daughter loves monster high! I have to admit that I think they are pretty cool too 🙂 I have three myself: Frankie, Draculaura, and Laguna Blue. They do dress a bit provocatively…I must say. My daughter wanted to be Frankie for Halloween but I didn’t think that the costume was very appropriate for a ten year old girl. Other than that, she and I have fun with the dolls and accessories 🙂
The look was super cute!
Yeah, it might be a bit hard to make their costumes appropriate for someone under 16 if you’re going exact. If you’re going more classic Bride of Frankenstein, you could be fine 🙂
AAAAAH I love Monster High! I have Ghoulia and Frankie. They’re the two that I really click with, being zombies or zombie-like, of course <3 Yay! Lovely look here, thank you!
Frankie is so adorable!
I am loving the infographics, ladies! Also, another idea for sticking on those rhinestones- eyelash adhesive! I use Duo and it works well and removes easily- and is very gentle and, of course, safe for the eye area 🙂
Good idea on the lash glue!
so cute! I love monster high 😀
I think they’re adorable 🙂
I love monster high! ;D I also have 6 dolls, but I’ve customized mine. My favorite is my PonPon Ghoulia xD
Really lovely tutorial too~ Cleo has my favorite makeup.
Oooh do you have pix?
I love Monster High! I have 6 dolls currently ~ this is such a cute tutorial, I’d love to see more on Spectra, Abbey and Draculaura, my favorites <3
They’re so cute! There is now a Draculaura look. I may try an Abbey look!
It’s lovely! I’ve never heard of Monster High before though. The characters design looks very cool!
I can’t wait for the other looks!
They’re super adorable!
I can’t stop staring at the colour on those cheeks! That has to be the prettiest ‘glow’ I have ever seen, I want it on my face right now! :O haha.
I agree, Sophie!
Gorgeous, dahling!
And there’s that Twinkling Rubies again, I need to get my hands on that.
Oh, and <3 Detrivore!
I think Erin’s look is amazing!